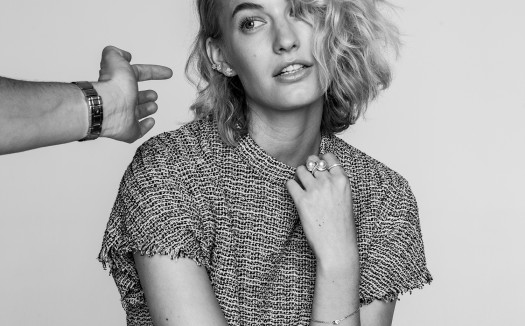
The one thing I often hear micro-influencers complaining about is that they don’t have a photographer.
Jumping between a full-time job, your blog, and housekeeping is no walk in the park, but we’ve all seen it done so we know it’s not impossible either. I often feel like finding the slightest bit of energy to be creative after a long exhausting day is my biggest battle. Ironically, that’s also key to taking stunning photos. So, what are we to do when we have no photographer and NO energy, but a backlog of content to produce?
I’ve learned quite a bit over the years while en route to the blogosphere - and have consistently poured my heart and soul into the photography and writing aspect of it. While I still have ways to go, I thought I’d share some tips to help you take stunning photos - or at least get you started.
- Pay attention to the light.
We often hear photographers talk about light, and that’s because it makes the picture! If you’re looking to shoot on a budget, natural light is your best bet; luckily, it’s summer in the states, which means longer days! We can shoot as soon as we get off work and achieve decent photos. But, note that NOT all light is equal. You’ll get better quality light some days over others. As you drive, pay attention to the way the light changes and how it affects the shadows around you. Once you study that enough, you’ll get a feel for what’s flattering and what’s not.
In the photo above to the right, the sun was beginning to set after work. The softest sliver of light peeked through the window so I took advantage of it and snapped for only 10 minutes. Only one image made the shot, but sometimes, one is all we need.
- Get a tripod & remote.
You can’t expect to take self-portraits without a tripod. Sure, you can set your camera on top of stacked books and use the self-timer, but by the time you’re ready to snap, the light will wane off. Take the easy route and just get the tripod + remote. It’s my go-to setup along with many others.
- Start with portraits rather than full-body shots.
I began experimenting with head shots long before I moved to full-body shots. You’ll learn faster about your “better” side, angles, and framing. Don’t expect overnight results. It might take a few months to achieve something you’re proud of, but when you finally do, the entire process goes down hill from there..
- Pick your outfit carefully.
My one favorite lesson through the years of self-portraits is that what looks good in person doesn’t always translate nicely in photos. That means wear clothes that photograph well and pieces that really flatter your features (as in your skin tone, body type, and makeup). A photograph is ONE cohesive piece so all the elements need to work together to yield a beautiful result. Voluminous, oversized pieces are generally too overwhelming on my small frame, but it can work if you’re taller and leaner.
- Editing is the cherry on top.
I love playing with color and watching how it changes the mood. All the images here were edited in Lightroom & Photoshop - and you can see how they all evoke a different feeling. The key is to experiment and find something you like. Obviously I love shadow and contrast. I highly recommend Zanita’s Photoshop Cheats for a detailed lesson.
- Use the right lens.
For portraits, I recommend a focal length of 50mm and above so you can avoid distortion - an 85mm would be ideal but it’s usually more expensive. To achieve full-body shots in tighter areas (like your bedroom), a 35mm is extremely useful.
- Don’t neglect your product shots.
Great photographs don’t only come in the form of portraits. Practice perfecting your flatlays as they’re a great way to break up your content while pushing the limits of your creativity. Aside from the tips provided in that post, the best thing you can do for yourself is to practice!
P.S. Don’t forget to enter my amazing giveaway here!
xo,
Susan
Follow me – Blog Instagram Bloglovin YouTube SHOP
You Should Also Read:
What I Learned from Top Influencers Through Azalle
How I Manage to Work From Home as a Mom
How to Become Comfortable with the Uncomfortable

